Free LetsEncrypt SSL on a Digital Ocean VPS running Ubuntu 14.04.5 using ServerPilot
Today we will show you how to install a 100% free SSL certificate from a CA (certificate authority). Our clients server was setup using a Digital Ocean Droplet with Ubuntu 14.04.5 and used Server Pilot configuration. It’s been long since known that Google and other SERPS encourage SSL, not to mention it gives your website a bit of an SEO boost. In Google own words, “To make a safer, more secure web.”
If you haven’t already login to Digital Ocean and create a droplet using Ubuntu 14.04.5 bas image. Then login to Serverpilot.io and connect your server. Once your set create you app. We used wordpress with PHP version 7.0, just be sure to take note on your app name, we will need this shortly.
Next, SSH into your droplet as Root, or a user with Root privileges.
First we want to clone the the LetsEncrypt script from the github repository.
sudo git clone https://github.com/letsencrypt/letsencrypt
Next move into the letsencrypt directory
cd letsencrypt
We now need to stop our NGINX process
sudo service nginx-sp stop
Now we communicate our server with LetsEncrypts server, and start the ssl installation process.
*NOTE: Replace domainname with your actual domain, and change the TLD to the one that matches yours i.e. .net .info etc.
sudo ./letsencrypt-auto certonly --standalone -ddomainname.net -d www.domainname.net
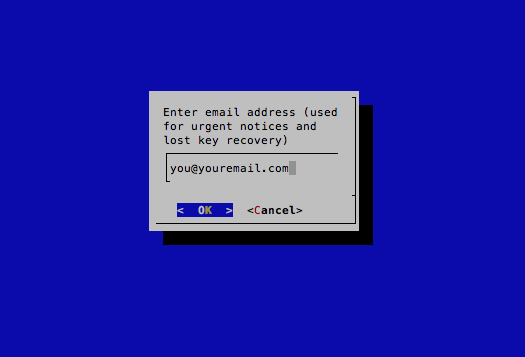
You will be prompted to enter your email address and agree to LetsEncrypt’s terms of use.
The above code will let you use your domain with or without www.
Restart NGINX ***IMPORTANT****
Next change directory to be able to create correct ssl.conf file witch will tell NGINX to listen to port 443 and to serve users sll. It also has our ssl key, private key, ssl_chiper, etc.
cd /etc/nginx-sp/vhosts.d
Now to create our ssl.conf. This is where we need your app name that you used in server pilot. ***Change appname with your apps name
sudo nano appname.ssl.conf
Here is the full file contents, pay close attention to the edits. Replace domainname.com with your domain name and TLD, replace appname with your apps name.
Edit Lines 4, 10, 30, 33, 35, 36, 46, and 47
server {
listen 443 ssl http2;
listen [::]:443 ssl http2;
server_name domainname.com www.domainname.com;
ssl on;

# letsencrypt certificates
ssl_certificate /etc/letsencrypt/live/domainname.com/fullchain.pem;
ssl_certificate_key /etc/letsencrypt/live/domainname.com/privkey.pem;

#SSL Optimization
ssl_session_timeout 1d;
ssl_session_cache shared:SSL:20m;
ssl_session_tickets off;

# modern configuration
ssl_protocols TLSv1 TLSv1.1 TLSv1.2;

ssl_prefer_server_ciphers on;

ssl_ciphers 'ECDHE-RSA-AES128-GCM-SHA256:ECDHE-ECDSA-AES128-GCM-SHA256:ECDHE-RSA-AES256-GCM-SHA384:ECDHE-ECDSA-AES256-GCM-SHA384:DHE-RSA-AES128-GCM-SHA256:DHE-DSS-AES128-GCM-SHA256:kEDH+AESGCM:ECDHE-RSA-AES128-SHA256:ECDHE-ECDSA-AES128-SHA256:ECDHE-RSA-AES128-SHA:ECDHE-ECDSA-AES128-SHA:ECDHE-RSA-AES256-SHA384:ECDHE-ECDSA-AES256-SHA384:ECDHE-RSA-AES256-SHA:ECDHE-ECDSA-AES256-SHA:DHE-RSA-AES128-SHA256:DHE-RSA-AES128-SHA:DHE-DSS-AES128-SHA256:DHE-RSA-AES256-SHA256:DHE-DSS-AES256-SHA:DHE-RSA-AES256-SHA:!aNULL:!eNULL:!EXPORT:!DES:!RC4:!3DES:!MD5:!PSK';

# OCSP stapling
ssl_stapling on;
ssl_stapling_verify on;

# verify chain of trust of OCSP response
ssl_trusted_certificate /etc/letsencrypt/live/domainname.com/chain.pem;

#root directory and logfiles
root /srv/users/serverpilot/apps/appname/public;

access_log /srv/users/serverpilot/log/appname/appname_nginx.access.log main;
error_log /srv/users/serverpilot/log/appname/appname_nginx.error.log;

#proxyset
proxy_set_header Host $host;
proxy_set_header X-Real-IP $remote_addr;
proxy_set_header X-Forwarded-For $proxy_add_x_forwarded_for;
proxy_set_header X-Forwarded-SSL on;
proxy_set_header X-Forwarded-Proto $scheme;

#includes
include /etc/nginx-sp/vhosts.d/appname.d/*.nonssl_conf;
include /etc/nginx-sp/vhosts.d/appname.d/*.conf;
}
Restart NGINX
sudo service nginx-sp restart
To auto update your SSL edit your server cron
sudo crontab -e
Enter 2 then press enter for using the nano editor
Add the following to the bottom.
@monthly /letsencrypt/letsencrypt-auto certonly --renew-by-default --webroot -w /srv/users/serverpilot/apps/appname/public -d domainname.com -d www.domainname.com
Finally add this to your .htaccess file in the root directory.
RewriteEngine on
RewriteCond %{HTTP:X-Forwarded-Proto} !=https
RewriteRule (.*) https://%{HTTP_HOST}/$1 [R=301,L]
RewriteCond %{HTTP_HOST} ^www.domainname.com [NC]
RewriteRule ^(.*)$ https://domainname.com/$1 [L,R=301,NC]
This uses the non www version and forces ssl on all pages. If you wish to use www.domainname.com remove the www from the first line and move it to the second line.
Happy Coding!!!
Why RewriteEngine, if u use Ngnix?
This tutorial uses Serverpilot script which uses Nginx as a frontend proxy and Apache for all the backend operations. Which is why we use Mod Rewrite 🙂
This tutorial uses Serverpilot script which uses Nginx as a frontend proxy and Apache for all the backend operations. Which is why we use Mod Rewrite ????